Archive | June 2012

AP 186 Activity 3: Image Types and Formats

To capture a certain moment in our lives, we usually take images. Hence, these images should be of good quality to be more appreciated.

This activity deals with image analysis. That is why large arrays are investigated. Thus, the number of stacksize in Scilab was primarily set to a large value in order to store many variables. For my case, I used

Figure 1. Setting the stacksize.

The first type of image I investigated for this activity is the binary image. Binary images are images that contain only black or white pixels, i.e., their pixel values are only 0 or 1 or what we call bits.

I thought of using a printscreen image of the command prompt at first since I thought the colors in that image were only black and white. It turns out that when I pasted an image of the command prompt in MS Paint Version 6.1 for Windows 7 Starter, there were gray pixels present! As I zoomed in, the edges of the letters have gray pixels. I expected that the white edges of the letters will be immediately surrounded by the black background. But no. 😦

I have learned that the image properties can be set to Black and white in MS Paint by clicking the Paint menu then Properties. Thanks to Gino Borja for that idea. By doing so, the image of the command prompt became indistinct since only black and white pixels were recognized.  That’s why I drew another image using MS Paint and set the color properties to Black and white. Out of my curiousity, I saved this image as bitmap, jpg and png to investigate which format will produce a bit depth of 1 and that the pixels values will be faithfully 0 or 1. It turns out that the bit depth is 1 when the format is monochrome bitmap, 16 when 16 color bitmap, 8 when 256 color bitmap, 24 when 24-bit bitmap (as expected), 24 when jpg and 1 when png. I’ve known such values upon looking at the Details tab of Properties when I right-clicked the images.

I also noticed that I can actually draw anything I want in MS Paint and save it as monochrome bitmap so that the bit depth is 1, i.e., it is black and white. I finally decided to use the png format to be consistent with other image types. As I zoomed in using MS Paint, the only colors present are black and white. No intermediate colors were present. The image is 3.14 kB and its dimensions is 508 x 512 pixels. It is shown in Figure 2.

Figure 2. Binary image created using MS Paint

When I used imread, it displays a big array describing the said image and only contains 0 and 255. However, I was expecting o’s and 1’s because it is a binary image.

I made another simple way to determine if the image is binary. The Scilab code is shown below. I just modified the starting commands from the Scilab code from the laboratory manual. In the console, the last semicolon is omitted to see the answer. The answer should be an empty set for it to be binary as this code looks for the indices of values greater than 1.

Figure 3. Scilab code to check if the image is binary

Then I examined my binary image using the following code

Figure 4. Size function of Scilab

The output of the size is

512.       508.        3.

This output tells us that the binary image has the dimensions of 508 x 512 pixels and it has 3 two-dimensional matrices with 508×512 pixels each. These are the RGB values. This means that the binary image I used was read as a Truecolor image. To display more of the properties of the image, I used imfinfo. The Scilab code is shown below

Figure 5. Scilab and imfinfo command

The outputs of imfinfo for my binary image are the following:

File size – 3224.  (bytes)

Width – 508.   (pixels)

Height – 512.   (pixels)

Bit depth – 8.   (number of bits per pixel)

Color Type – truecolor

Therefore, the binary image is really accepted by Scilab as a truecolor image. However, when I look at the properties/details of the binary image itself by right-clicking, the bit depth is 1.

The second type of image is grayscale image. Figure 6 shows my grayscale image of a teddy bear. Grayscale or greyscale images are also black and white images. However, the pixel values range from 0 (black) to 255 (white). Therefore, the are different shades of black and white in this image. For this case, a pixel is equal to a byte.

Figure 6. Grayscale image of a teddy bear.

I used size and imfinfo commands and the outputs are

size:  1944.   2592.    3.

imfinfo:

File size – 976867.   (bytes)

Width – 2592.    (pixels)

Height – 1944.    (pixels)

Bit depth – 8.    (number of bits per pixel)

Color Type – truecolor

As I checked the properties by right-clicking the image, the dimensions and file size are correct but the bit depth is 24.

The third type of image is a truecolor image. It has three channels or bands showing different intensities of red, green and blue pixels. An example is shown in Figure 7.

Figure 7. A truecolor image.

By using the Scilab codes in Figures 4 and 5, the results are:

size: 1552.   2455.    3.

imfinfo:

File size -1339340.  (bytes)

Width – 2455.   (pixels)

Height -1552.    (pixels)

Bit depth – 8.   (pixels)

Color Type – truecolor

Still, the dimensions and size are consistent but the bit depth is 24 when I right-clicked the image.  The fourth type of image is an indexed image. It is a colored image are represented by numbers representing the index numbers of the colors of a color map. It usually has smaller information than truecolor images. For my indexed image, I used a photograph of a pizza.

Figure 8. Indexed image of a pizza.

The specifications are as follows:

size:  1944.    2592.    3.

imfinfo:

File size – 996481.   (bytes)

Width – 2592.    (pixels)

Height -1944.    (pixels)

Bit depth – 8.   (pixels)

Color Type – truecolor

Again, the size and dimensions are the same but the bit depth is 24.

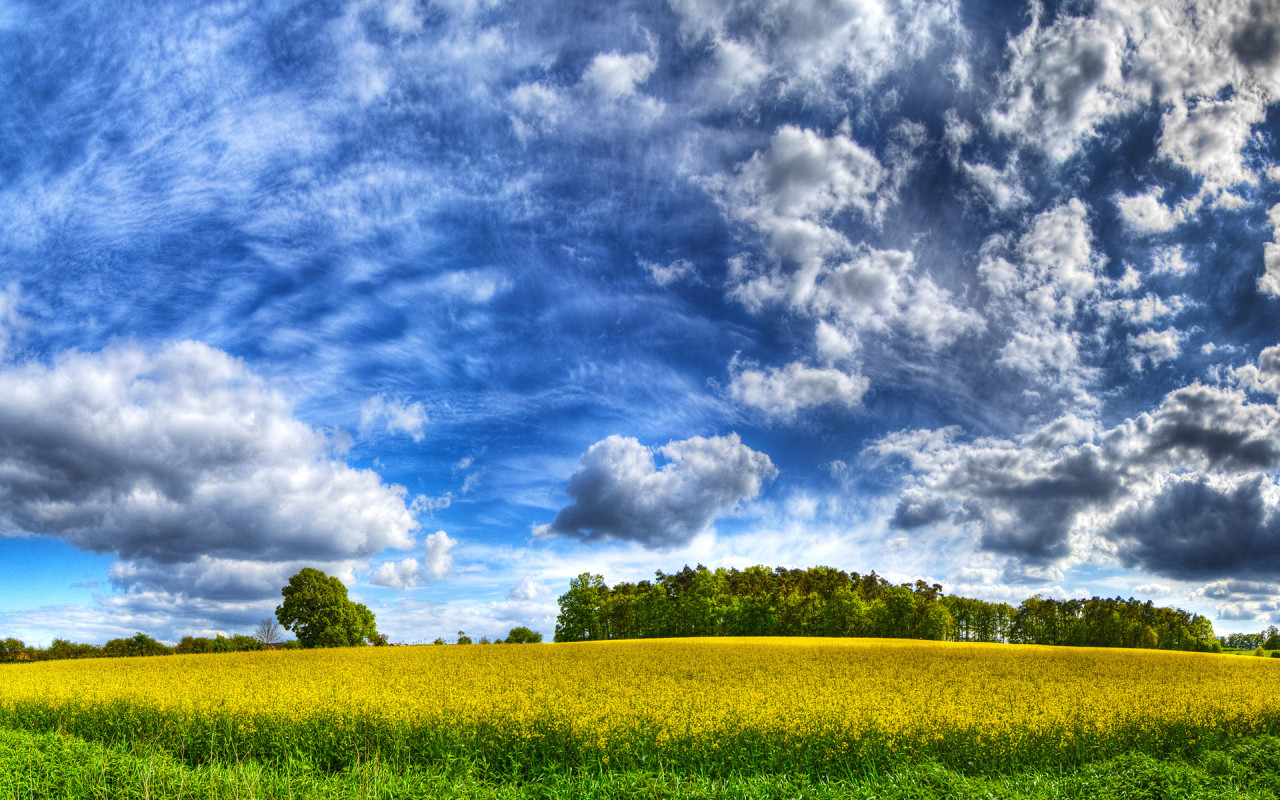
The fifth type of image is called High Dynamic Range (HDR) image. It is usually used to show finer details of objects or phenomena. Examples of this type are x-rays, cloud images, explosions and plasma. These images can be stored in 10 to 16-bit grayscale images. An example is shown in Figure 8.

Figure 9. HDR image of nature [1].

Using imread, size and imfinfo to Figure 9, the outputs are

size: 800.    1280.    3.

imfinfo:

File size -468200.   (bytes)

Width – 1280.   (pixels)

Height – 800.    (pixels)

Bit depth – 8.   (pixels)

Color Type – truecolor

However, the bit depth is 24 upon right-clicking. The size and dimensions are the same.

The sixth type of image is called Multispectral or Hyperspectral Image. These usually have bands or channel of RGB values in the order of 10. An example is shown below.

Figure 10. A Hyperspectral fluorescene image of corn leaf [2].

The details are shown below. Note that the bit depth upon right-clicking is 32.

size: 297.    471.    3.

imfinfo:

File size – 338868.    (bytes)

Width – 471.    (pixels)

Height -297.    (pixels)

Bit depth – 8.   (pixels)

Color Type – truecolor

The seventh type of image is 3D image.  This type shows the spatial information such as depth and angles and may contain two or more images. An example is shown below.

Figure 11. A 3D image of a stuff toy [3].

The specifications are shown below using size and imfinfo function of Scilab.

size:  1200.    1470.    3.

imfinfo:

File size – 2887771.    (bytes)

Width –  1470.    (pixels)

Height – 1200.    (pixels)

Bit depth – 8.   (pixels)

Color Type – truecolor

The bit depth upon right-clicking is 24. Moreover, the dimensions are consistent with the results shown above

The last image type is Temporal image or Video. This is a series of frames which has now high definition and high frame rates. An example is depicted below. The video from Youtube [4] is about different fast events or processes that are shown in slow manner.

http://www.youtube.com/watch?v=71nURVXXeaM&feature=related

The first four types of images are basic and the rest are known as advanced image types.

As I used help in the Scilab console to check for imfinfo, the only colortype available are ‘grayscale’ and ‘truecolor’. Based on what I did for this activity, I have learned that Scilab considers the image to be truecolor unless otherwise it is converted to grayscale.

The next part of this activity is to convert the truecolor image in Figure 7 to binary and grayscale. The Scilab code is shown below.

Figure 12. Scilab code for conversion from truecolor image to binary and grayscale images.

Unfortunately, there was an error than hinders the program to show the binary and grayscale images as I executed the code. The error is:

                                   –>imshow(I)
!–error 17
stack size exceeded!

                                   Use stacksize function to increase it.

                                   Memory used for variables: 7907952

                                   Intermediate memory needed: 2154566

                                   Total memory available: 10000000

                                   at line 13 of function typeof called by :
at line 22 of function char called by :
at line 28 of function imshow called by :
imshow(I)

Even when I increased the stacksize up to the maximum, 268435454, the same error appeared. I restarted my laptop and cleared the variables but the same error has appeared. I believe the image was just too large. I have encountered this type of error in the previous images for this activity. I just increased the stacksize and it worked. But for this case, I find it time consuming so I just resized my truecolor image. The new size has the following details:

File size – 314732.   (bytes)

Width –  398.    (pixels)

Height – 252.    (pixels)

The truecolor image was converted to binary images with different threshold values. The size of all the binary images despite having different appearance is 398×252 pixels. This is the same with the truecolor image of interest. It is expected since the conversion only changed the value of each pixels but not the dimensions. Moreover, there is no indicated number of channels upon using size function Scilab. This means that Scilab reads it as a binary image. These are shown below.

Figure 13. Grayscale images of the truecolor image from the resized Figure 7 with (a) 0.2, (b) 0.3, (c) 0.5, (d) 0.7 and (e) 0.9 threshold values.

Figure 13 shows that as the threshold value approaches 0, the image becomes nearly white. As the threshold approaches 1, the grayscale image darkens. The threshold value ranges from 0 to 1 only. It is because if the pixel value is greater than the threshold, it will be marked as 1 (white) and 0 (black) otherwise.

Figure 14 shows the grayscale image of the truecolor image. The pixel values for this image are ranging from 0 (black) to 255 (white) upon using rgb2gray function.

Figure 14. Converted grayscale image of the truecolor image

The next part of the activity is to convert the scanned plots from Activity 1 to grayscale and investigate the graylevel histogram of the image. The 425 x 577 scanned image is shown below. The original scanned image’s dimensions is 2004 x 2724 pixels. I reduced the size for this activity so the processing time is faster. The scanned plot is shown below.

Figure 15. Scanned image of the hand-drawn plot from Activity 1.

The image from Figure 15 was grayscaled using rgb2gray function. The imhist function was used to obtain its histogram.  The Scilab code is shown below.

Figure 16. Scilab code for the histogram analysis

The dimensions of the grayscale and truecolor images are both 425 x 577 pixels. However, the grayscale has no indicated number of channels while the truecolor has 3 channel as indicated by the size function. The corresponding grayscale image is shown below

Figure 17. Grayscale image of Figure 15.

The grayscale image from Figure 17 is investigated using histogram. Its histogram is shown below

Figure 18. Graylevel histogram of Figure 17.

From Figure 18, it can be seen that there are many pixels, about 185000 pixels out of 245225 pixels, have a pixel value of 241.57895 which is nearly white. It can bee seen from Figure 17 that the dominating color is white indeed. Then Figure 15 is converted is black and white, i.e., binary image. I used imbw function to convert it. Figure 19 shows the black and white image with a threshold of 0.5.

Figure 19. Binary image of Figure 15.

The Scilab code for this conversion to binary image is shown in below.

Figure 20. Scilab code for converting a scanned truecolor image to binary or black and white image.

For the last part of the activity, different image formats are discussed:

Graphics Interchange Format (GIF) is a format that has a limited 256-color value palette from a set of about 16 million color values. Thus, if the picture has only 256 colors or fewer, this format will store the entire image without compression, i.e., it is lossless.  Otherwise, its algorithm will reduce the colors and approximate the nearest color value of the pixels. For an image with lots of colors, GIF format will be lossy. This format are often used in web pages [5].

Portable Network Graphics (PNG) format is a lossless image format. It uses patterns in compressing the size of the image. It is usually used as web image and it can do everything that GIF can do. And sometimes, PNG is better so it might replace GIF in the future (according to [5]). However, it cannot replace JPG because the latter is good at compression while keeping a good quality of image at a small image size [5].

Tag Image File Format (TIFF) can be a lossless or lossy format. It is usually used as a lossless image format and is usually unsupported by internet browsers [5].

Joint Photographic Experts Group (JPEG, JPG for short) is usually used for photos that has several colors. It stores images with 24-bit color. It is good in finding the best compression ratio to maintain the quality of the image. One way is by omitting colors that has low probability that the human eye can notice. However, the compression of JPG can be adjusted using photo editors. By these information, JPG is a better format for photos than GIF [5]. 

Bitmap (BMP) is a protected format by Microsoft [5]. According to [5], there is no reason to use this kind of format.

Raw file (RAW), from the name itself, is an unprocessed format maintaining the quality of the image [6]. It has the original RGB pixels by the sensor of the camera as it passes through an analog-to-digital converter (ADC). Nikon calls it NEF file [7]. It is basically a lossless output image of camera. Since these are lossless, they usually take large storage space. Manufacturers have unique RAW formats so it not advantageous to use this for general purposes. The manufacturer’s software should be used to access the file [5].

Encapsulated PostScript (EPS) usually used as a screen preview. It is the only format that can use transparent white in bitmap [8].

PSD, PSP, etc., are patented formats of different graphics programs. For example, Photoshop has PSD format and Paint Shop Pro files has PSP format. These working formats are used to access the image, especially when it is complex. Editting these files by converting to other formats might lead to lossy images [5]. Windows Metafile (WMF) are files consisting of calls to Microsoft graphics [8].

From these different image formats, I have learned that even when I did my best to make an image of great quality, some information might be lost upon saving the image with the wrong format. It is very essential to look for and choose the best format for a specific case.

For this activity, I give myself a grade of 10/10 since I did everything that was tasked. Moreover, I also varied some variables which can affect the resulting images.

References

1. “HDR Sky desktop wallpapers download”, available at http://www.zastavki.com/pictures/1280×800/2009/Nature_Seasons_Summer_HDR_Sky_017902_.jpg.

2. “Biochemical Imaging”, available at http://bio.sandia.gov/solutions/imaging.html.

3. “Digital 3d Photos”, available at http://www.heuristicresearch.com/media/d3d.html.

4.”Amazing Super Slow Motion”, available at http://www.youtube.com/watch?v=71nURVXXeaM&feature=related.

5. “Digital Image File Types Explained”, available at http://www.wfu.edu/~matthews/misc/graphics/formats/formats.html.

6. “Camera RAW”, available at http://www.techterms.com/definition/cameraraw.

7.”RAW, JPEG and TIFF”, available at http://photo.net/learn/raw/.

8. “Understanding Image File Formats”, available at http://amath.colorado.edu/computing/graphics/understand_fmts.html.

9. “Acronyms & Abbreviations”, available at http://www.abbreviations.com.

10. Maricor Soriano, “A3 – Image Types and Formats”, Applied Physics 186 Laboratory Manual,  2010.

AP 186 Activity 2: Scilab Basics

Scilab is an open-source software which is effective for array and matrix operations [1,2]. Therefore, it is also an effective programming language for image processing like Matlab.

For this activity, we were tasked to install Scilab 5.3.3 from http://www.scilab.org and the Signal Image and Video Processing (SIVP) module from http://www.scilab.org/products/modules/scm. Primarily, Scilab was installed in our computers. To check whether it was successfully installed, a simple snippet was executed:

If this snippet works, then the next step was to install the SIVP module. For my case, the downloaded SIVP_0.5.3.1 folder was copied to C:\Program Files\scilab-5.3.3\contrib  since my Operating System is 32-bit Windows 7 Starter. The Module Manager – ATOMS button in the standard toolbar was clicked followed by the SIVP_0.5.3.1 in the Toolboxes tab of the Scilab console.

To check whether SIVP works, the imshow command should be working. The algorithm which simulates a centered circular aperture or a centered circle in 2-dimensions was given. Once this algorithm displayed the corresponding image, then the SIVP module was properly installed. The Scilab code is shown below and the corresponding output image is shown in Figure 1.

//centered circular aperture
nx = 100; ny = 100; //defines the number of elements along x and y
x = linspace(-1,1,nx); //defines the range
y = linspace(-1,1,ny);
[X,Y] = ndgrid(x,y); //creates two 2-D arrays of x and y coordinates
r= sqrt(X.^2 + Y.^2); //note element-per-element squaring of X and Y
A = zeros (nx,ny);
A (find(r<0.7) ) = 1;
imshow (A);

Figure 1. Simulated circular aperture

The next procedure is to simulate other algorithms which demonstrate optical phenomena in imaging. The first is a synthetic image of a centered square aperture. The Scilab code for this image was actually a modified version of the code for the centered circular aperture. At first, I was thinking of using for loop but when I heard from Ma’am Jing that Scilab is a good programming language because it can execute algorithms shorter than other language, the abs function came to my mind. From that time on, I thought of ways on how to optimize my codes. The code and the image for the square aperture is shown below. A line preceded by a double slash denotes a comment.

//centered square aperture
nx = 100; ny = 100; //defines the number of elements along x and y
x = linspace(-1,1,nx); //defines the range
y = linspace(-1,1,ny);
[X,Y] = ndgrid(x,y); //creates two 2-D arrays of x and y coordinates
r= sqrt(X.^2 + Y.^2); //note element-per-element squaring of X and Y
A = zeros (nx,ny);
A(find(abs(X)<0.3 & abs(Y)<0.3)) = 1;
imshow (A);

Figure 2. Centered square aperture.

A synthetic image of a sinusoid along the x-direction was also simulated. It is shown in Figure 3.

Figure 3. 2-dimensional sinusoid along the x-direction

The code for this image is shown below. Another way to display the sinusoid is by using the mesh plot shown in Figure 4. Its shape is similar to a corrugated or rippled roof. I chose sin(3*pi*X) because I want a bigger wavelength.

//sinusoid along the x-direction (corrugated roof)
nx = 100; ny = 100; //defines the number of elements along x and y
x = linspace(-1,1,nx); //defines the range
y = linspace(-1,1,ny);
[X,Y] = ndgrid(x,y); //creates two 2-D arrays of x and y coordinates
A = zeros (nx,ny);
A = sin(3*%pi*X);
mesh (A); //if 3-dimensional
//imshow (A); //if 2-dimensional

I want to thank Rommel Bartolome for telling me that the mesh plot can be used in this item.

Figure 4. Sinusoid along the x-direction in three dimensions.

The third synthetic image which was asked to be simulated was a grating along the x-direction. I noticed that Figure 3 can look like a grating if there where no “gradient” in the values. That is why, I thought of modifying the sinusoid code then look for a threshold value and set it to 1 in order to make a grating. The code is shown below. My threshold for this case is 0.9.

//grating along the x-direction
nx = 100; ny = 100; //defines the number of elements along x and y
x = linspace(-1,1,nx); //defines the range
y = linspace(-1,1,ny);
[X,Y] = ndgrid(x,y); //creates two 2-D arrays of x and y coordinates
A = zeros (nx,ny);
A(find(abs(sin(3*%pi*Y))>0.9)) = 1;
mesh (A); //if 3-dimensional
imshow (A); //if 2-dimensional

The corresponding grating image along the x-direction is shown in Figure 5.

Figure 5. Grating along the x-direction.

Alternatively, the mesh plot can also be used to this kind of function but it will not show a grating. It will only show a series of ups and downs like that of a 2-bit synchronous counter.

The next image created was an annulus. In Mathematics, it is defined as the area between two concentric circles with different radius [3]. Since it talks about rings, I modified the centered circle Scilab code by choosing to values of radii. These will be the concentric circles and the area between them will be the annulus. The Scilab code is shown below. Moreover, the image of the annulus is shown in Figure 6.

//annulus
nx = 100; ny = 100; //defines the number of elements along x and y
x = linspace(-1,1,nx); //defines the range
y = linspace(-1,1,ny);
[X,Y] = ndgrid(x,y); //creates two 2-D arrays of x and y coordinates
r= sqrt(X.^2 + Y.^2); //note element-per-element squaring of X and Y
A = zeros (nx,ny);
A (find(r>0.3 & r<0.7) ) = 1;
imshow (A);

Figure 6. Simulated image of an annulus.

The last task is to create an image of a circular aperture with graded transparency or Gaussian transparency. From the term itself, I thought of a transparent medium which has a Gaussian distribution, meaning the middle has the highest transmittance T and the value of T dies down in all directions since we were dealing with 2-dimensional matrices. It was not indicated if this aperture is center but for symmetry and convenience purposes, I chose to make the aperture centered.

In this case, I made use of Gaussian function. In 2 dimensions, this function centered at (0.5,0.5) is expressed as

where the 0.2 value is the width of the kernel [4]. The Scilab code is written below and Figure 7 shows the said image.

//circular aperture with graded transparency (Gaussian transparency)
nx = 100; ny = 100; //defines the number of elements along x and y
x = linspace(-1,1,nx); //defines the range
y = linspace(-1,1,ny);
[X,Y] = ndgrid(x,y); //creates two 2-D arrays of x and y coordinates
A = zeros (nx,ny);
A = exp(-(X.^2 + Y.^2)/(2*0.3^2)); //note element-per-element squaring of X and Y
imshow (A);

Figure 7. Simulated circular aperture with Gaussian transparency

Scilab was already introduced to us last semester in Applied Physics 185. I can still remember I had a very hard time installing the SIVP module. The good thing is that there were some computers in the computer room installed with Scilab. But now, it is successfully installed in my laptop and I can enjoy the free and convenient Scilab program language. This activity did not only focus on the basics of Scilab but also on basic matrix operations. I have learned that Scilab is a good programming language if we are dealing with matrices.

For this activity, I will give myself a grade of 10/10 because I was able to finish the codes before 1pm despite having the hard time to install Scilab and SIVP. I think my figures are also clear even if the resolutions were 100 x 100 pixels only. I followed the instructions in the manual. I cannot give myself some bonus points, I guess, because I did not make use uint8(). I did my codes based on how I can imagine the images in my mind.

References:

1. “Key Facts”, available at http://www.scilab.org/aboutus/consortium/key.

2. Maricor Soriano, “A2 – Scilab Basics”, Applied Physics 186 laboratory manual, 1st semester AY 2012-13.

3. “Annulus”, available at http://www.thefreedictionary.com/annulus.

4. “Plotting 2D Functions”, available at http://www.site.uottawa.ca/~edubois/courses/CEG4311/plotting_2D.pdf.

AP 186 Activity 1: Digital Scanning

Ratio and proportion were already taught as mathematical concepts during the early gradeschool years. Actually, even in the tertiary education, this elementary concept is still utilized. One way is by digitizing an image. By means of ratio and proportion, the image points and the Cartesian coordinates are matched so that one can actually measure the size of an image or a particular part of an image. Digitizing is also very important in the research field especially when collaborators are far from each other. If they need to send large amount of data, they can send an image instead and the other party can digitize it to extract the data. However, one should consider the accuracy of the digitized values.

For this activity, I looked for a hand-drawn graph in the National Institute of Physics library last June 14, 2012. I finally chose a graph showing a curve of current in milliamperes as a function of relative humidity of an electronic hygrometer. I directly scanned the page of the book and it is shown in Figure 1. I acquired the plot from a proceedings entitled “On the Development of an Electronic Hygrometer” from the Proceedings of the Fourth National Physics Congress. The authors were Dr. Caesar A. Saloma and Mr. Enrico G. Yap of National Institute of Physics, College of Science, University of the Philippines-Diliman, Quezon City, Philippines.

It’s a shame that I do not know Mr. Yap. I cannot find a credible source to identify his profession so that I could use a proper name prefix. To be safe, I used the title “Mr.” instead.

The fourth National Physics Congress was held at the University of the Philippines-Baguio on March 31 to April 3, 1985. It was organized by the Samahang Pisika ng Pilipinas (SPP). The compilation of the said proceedings was edited by Mr. Christopher C. Bernido.

Figure 1. Scanned image of the hand-drawn graph from the Proceedings of the Fourth National Physics Congress [1].

The pixel resolution of the scanned image referring to Figure 1 is 2004 x 2724 pixels and its size is 866 kB. However, the resolution of Figure 1 itself in this post is only 300 x 500 pixels for formatting purposes. The scanned image was saved as scanned_plot.jpg. This image was grayscaled (B&Wcommand) using Picasa 3.9.0 by Google, Inc. and was saved as grayscaled_plot.jpg. The image size then dropped to 632 kB with the same pixel resolution. It is shown in Figure 2. Both image formats were JPG (short version of Joint Photographic Experts Group) [2].

Figure 2. Grayscaled image of Figure 1 using Picasa 3.9.0.

I opened the grayscaled_plot.jpg using MS Paint Version 6.1 for Windows 7 Starter afterwards. I used the Select command to crop out the area that I need to measure and to focus on. Upong Select-ing, I noticed that the plot is slightly tilted. That’s why I used Picasa again to correct the orientation. I slightly rotated the plot counterclockwise using the Straighten command. This image was saved and I opened it again in MS Paint for the next step. Fortunately, I found out that the x and y-axes were perpendicular to each other. As can be seen in Figure 1, the authors made use of a guide, maybe a graphing paper, to establish perfect axes. Hence, there will be very minimal room for errors. I then used the Select command to crop the plot so that the lowermost and leftmost point of the image is approximately the origin of the Cartesian coordinate system. The image pixel value will be identified later as I hover the mouse pointer around the image using MS Paint. The x and y-axes I followed were the ones connected to the point (0,0) of the Cartesian coordinate system. The other x and y-axes were actually not perpendicular to each other.

Figure 3 shows how perpendicular the x and y-axes I followed. It also shows that the other axes were not perpendicular. These lines were used to identify the position of the points in the curve. Imperfections such as these are inevitable for hand-drawn graphs. That is why it is very important to use computer programs nowadays to plot numerical values and relationships for accurate display of results. This is one of the benefits of the advancement of technology.

Figure 3. Illustration of how the hand-drawn plot was cropped

On the other hand, Figure 4 shows the cropped plot following the x and y axes connected to the corresponding (0,0) point using Cartesian coordinate system. The image size expectedly dropped to 507 kB with a resolution of 1296 x 1300 pixels. However, the display resolution of this plot in this blog is only 300 x 300 pixels. Note that the origin of the Cartesian coordinate system, point (0,0), has the image pixel location of (9, 1295) px.

Figure 4. Cropped hand-drawn graph which was investigated.

To find how many pixels in the x and y-axes correspond to the physical or actual values of the tick marks of the graph, the actual values were related to the pixel position for each axis. Figure 5 shows the relationships and corresponding linear trends. These were calculated using Microsoft Office Excel 2007.

Figure 5. Linear relationship between pixel locations and axes values.

The two equations from Figure 5 were used to determine the physical values of the points in the curve which in turn used to interpolate points for the entire curve. I chose 19 pixel locations in the curve instead of just the 6 encircled points to get a closer shape of the curve. Figure 6 shows the resulting physical values corresponding to the 19 (x,y) pixel location I chose. In other words, I substituted the 19 x pixel locations to the linear trend for the x-axis and substituted the values of the 19 y pixel locations to the linear trend for the y-axis.

Figure 5. Plot of the interpolated points and the digitized curve.

It can be visually observed that the set of interpolated points were similar to the hand-drawn plot. But as scientists, this observation is not enough. To quantify this relationship, the physical values of the 6 encircled points from Figure 1 points can be compared to the corresponding digitized values of the curve from Figure 6. Table 1 summarizes the said comparison. The second to fourth digitized values were converted into two significant figures so that it will be the same with the physical values. In simple terms, there is no difference between the digitized and the physical values.

Table 1. Comparison of the digitized and physical values of the overlaid plots in Figure 6.

The digitized plot can also be overlaid to the original hand-drawn plot for a clearer and straightforward comparison. I saved the digitized curve in Microsoft Office Powerpoint 2007 using Save as Picture… and opened it again in the same window. In the Format tab, I clicked the Recolor tab in the left in drawing toolbar and chose Set Transparent Color. Then I clicked the white background of the image plot to make it transparent. I then inserted the cropped plot from Figure 4 and clicked Send to Back button in the drawing toolbar. And then I clicked the digitized plot again and overlaid it by clicking Bring to Front button in the same toolbar. There I resized the two images so that they correspond to each other. I superimposed the endpoints of each plot so they will really overlap. I grouped them so that they will be saved in a single image. Figure 7 shows the overlaid images.

Figure 6. Overlaid images of the cropped hand-drawn graph and the digitized curve.

From Figure 7, it can be seen that the curves were really similar to each other. However, they are not perfectly the same. These account for the errors and the 0.9999 correlation coefficients from the relationship of pixel location and physical values from Figure 5. Moreover, the two curves were similar because the hand-drawn x and y-axes were perpendicular.

I recommend that the scanned image be of good resolution so that the correct pixel position will be focused. Pixel position should also be chosen with much care and accuracy.

In this activity, I will give myself a grade of 10/10 because I understood the concept of digital scanning and I think my plot is very near to the hand-drawn plot. I also think that I have done the things that should be done for this experiment. My plots are clear and of good quality.

References:

1. Caesar A. Saloma, Enrico G. Yap, “On the Development of an Electronic Hygrometer” in Proceedings of the Fourth National Physics Congress, (University of the Philippines-Baguio, Philippines, 1985), pp. 111.

2. “Resources”, available at www2.johnson.cornell.edu/currentstudents/logo_template.html.

3. Maricor Soriano, “A1 – Digital Scanning”, Applied Physics 187 laboratory manual 1st semester AY 2012-13.